

This article provides a comprehensive, step-by-step guide to deploying Rimo3 Workspaces in your Azure subscription. It mirrors the full deployment flow as experienced in the platform, including detailed explanations of why each step exists and the strong security measures embedded throughout.
The goal of this guide is to provide not only instructions, but also the reasoning behind each decision point, so you understand how Rimo3 ensures a secure, reliable, and enterprise-ready deployment.
Prerequisites & Workspace Sign-In
Before beginning deployment, you need to have a Workspace created inside the Rimo3 platform. Once your Workspace exists, you have two sign-in options:
-
Local user credentials
-
Microsoft Entra ID (recommended)
We strongly recommend using Entra ID with your Microsoft account for a more secure and streamlined login experience.
If this is your first time opening the workspace, you will be guided through the Rimo3 Deployment Wizard.

Step 1: Generate the Registration Key
The first step in the deployment journey is generating a Registration Key. This key is a short-lived JWT token issued by Rimo3’s secure backend services. It is generated on demand when you click the button, and it is automatically copied to your clipboard.
Key Facts:
- The key is valid for 4 hours.
- It is only used during the registration process.
- It ensures only genuine Rimo3 customers can deploy our PaaS components.
- It logically connects your Azure-deployed resources to your Rimo3 SaaS workspace.
⚠️ Important: Never share or distribute the registration key. After registration, new secure tokens are automatically issued to the deployed components, so the registration key itself is not reused.

Once the registration key has been generated and copied, the Take me to Azure! button is enabled, allowing you to launch the Azure Marketplace (MPO) deployment flow.
Step 2: Azure MPO Deployment Flow
Clicking Take me to Azure! launches the Azure Marketplace wizard, which guides you through configuring and deploying the Rimo3 components into your subscription. The process involves multiple configuration steps.
2.1 Basics
You’ll select:
- Azure subscription
- Resource group (new or existing)
- Region (all components will be deployed in the same region)
Important role requirements:
- If you create a new resource group, you must have Owner rights at the subscription level.
- If you use an existing resource group, you must have Owner rights on that group.
Rimo3 will not touch any resources outside of the chosen resource group.

2.2 Registration
Paste the registration key you copied from the Rimo3 platform into the field and confirm it. This securely links your Azure deployment to your Rimo3 SaaS tenant.

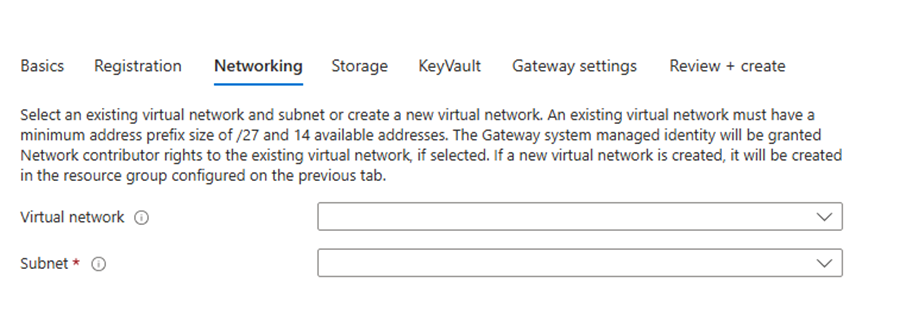
2.3 Networking
Next, you will configure networking. You can select an existing VNet or create a new one.
Best practices:
- Create a dedicated VNet for Rimo3 resources.
- Consider future peering requirements — choose an address space that avoids collisions.
- Minimum requirement: a subnet with at least 14 available IP addresses (/27). This number scales depending on the level of parallelism you want in your app processing. It can be reduced for POCs or increased for large-scale app churn.
2.4 Storage
Here you configure a dedicated storage account. This storage is used for:
- Uploads via UI and/or REST API as well as for imports from the Rimo3 Patch Catalog
- Storing modernized packages (MSIX, App Volumes, FlexApp ONE, .intunewin)
- Hosting an SMB file share, automatically mounted on Rimo3-provisioned VMs
- Providing blob containers for exporting apps to Intune, Nerdio Manager, WPM, or for direct download
We strongly recommend creating a storage account dedicated to Rimo3 to ensure clean separation.

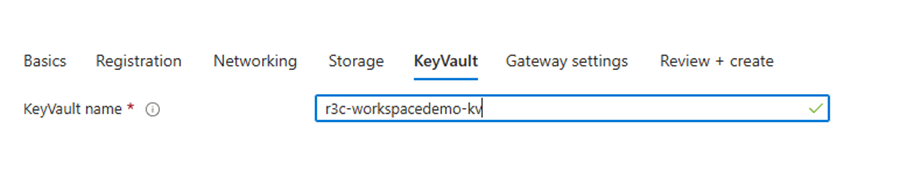
2.5 Key Vault
At this step you configure an Azure Key Vault to securely store sensitive data:
- Registration key
- VM local admin credentials
- Optional domain join service accounts, domain name, OU Path, auto-logon accounts, etc.
Rimo3 follows Azure and NIST best practices:
- Secrets are only accessible to Rimo3 VMs via system-assigned managed identity.
- No human access by default.
- Access is always least-privilege.
2.6 Gateway Settings
Provide details for the Gateway VM:
- Local admin credentials
- Resource names for the VM, disk, and NIC (flexible to match naming conventions)
VM SKU and size can be adjusted later after deployment to match workload requirements.

2.7 Review + Create
Finally, review all configuration details and click **Create**. Azure will immediately run a validation script to check the registration key. If invalid, the deployment aborts and resources are cleaned up.
If validation succeeds, Azure deploys the resources: VNet, Storage, Key Vault, and Gateway VM. The Gateway VM is automatically configured with:
- Sysinternals Autologon for seamless logins
- Ports 5000 (SignalR) and 5001 (logging) open for communication
- Gateway agent installation and registration

Step 3: Resource Deployment Progress
Back in the Rimo3 portal, you can track deployment progress across three stages:
- Deploying Azure resources
- Configuring the Gateway
- Gateway registration
The Continue Ascent! button remains disabled until the registration key is validated and the Gateway is successfully registered. Once these steps complete, the button is enabled to proceed.

Step 4: Health Check (Requirement Checker)
At this step, Rimo3 validates that your deployment meets all requirements. Two agent statuses must show as Online: the Gateway and the Persistent Task Runner.
Click Run checks to perform comprehensive validations:
- Connectivity to Rimo3 SaaS
- RBAC rights (Owner, Network Contributor)
- Managed Identity configuration
- Network and port availability
Any issues are flagged for remediation. You can also export a PDF health check report for distribution to internal teams.

Step 5: Configure Operating Systems
Now you define the operating system images for your Rimo3 workspace. You can choose from vanilla Azure Marketplace images or your own custom images.
Detailed Roles:
- Discovery OS: Used for app discovery and initial smoke tests. This is your baseline OS.
- Target OS: Represents the destination OS for migration projects (e.g., moving from Windows 10 to Windows 11 24H2). Apps are validated here before migration.
- AVD OS: Multi-session images for Azure Virtual Desktop. Rimo3 tests application suitability in multi-session environments.
- Modernize OS: Used to convert or capture apps into modern packaging formats (MSIX, App Volumes, FlexApp ONE). Best practice is to modernize on the same OS version where the app will ultimately run.

Step 6: Completion
Congratulations, you’ve completed the deployment! Your Rimo3 Workspace is now live and ready to use.
From here, you can:
- Import applications from the Patch Catalog
- Run discovery, assessments, smoke tests, and migrations
- Modernize apps into supported formats
- Export apps to Intune, NME, WPM, or download directly

Security at Every Step
Rimo3 emphasizes security throughout deployment:
- Registration keys are short-lived JWTs, valid only during registration
- Validation scripts abort deployments if keys are invalid
- Gateway receives new secure JWTs after registration
- All secrets are stored in Key Vault, accessible only to VMs via Managed Identity
- Deployment is scoped only to the selected resource group
- Automatic cleanup if validation fails
- Ports are restricted only to what’s necessary for Rimo3 communication
Final Thoughts
The Rimo3 deployment process typically takes 20–30 minutes end-to-end. It combines transparency, automation, and enterprise-grade security to give you a fully operational workspace quickly.
With your Rimo3 Workspace now live, you can immediately begin discovery, testing, modernization, and migration — all while knowing the foundation was deployed securely and according to best practices.
Welcome to the Summit! 🏔️
